The first step is to create your mesh and then draw the path you want it to follow this is usually done with the line tool.
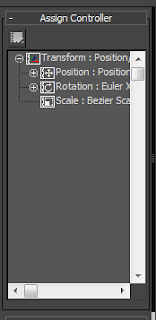
Next form the side tool bar you select the motion tab and then click on assign controller.
The next step is to select the position option from the option tree and then click on the accept button that lights up with a green tick in the top left of the section.
You are then given a window with many options, here you select the Path Constraint option and click ok.
Then back on the tool bar ob the right you click the add path button that has appeared and then click on the path which you wish your object to follow.
Below is the timeline bar for the animation.
Here is the animation that was produced from the above procedure.


No comments:
Post a Comment