For this task we had to build a castle within 3D max. It was to have full battlements and a door in to the castle.
During this project I used two new tools firstly the Align Tool and secondly the Boolean removal tool.
To start off I created a cylinder and a cone after this I went in to the parameters for each object and gave them the same diameter, this meant that when I came to align them they would look good together with no overhang or rough edges.

The following 2 images show the creation of the 2 objects.


Once the two objects had been created and sized it was time to align them. The below image is a shot of the tool bar where the align tool is located.

To align two objects you first select the object you wish to move. You then click the align button on the toolbar and then select the object you with to align with.

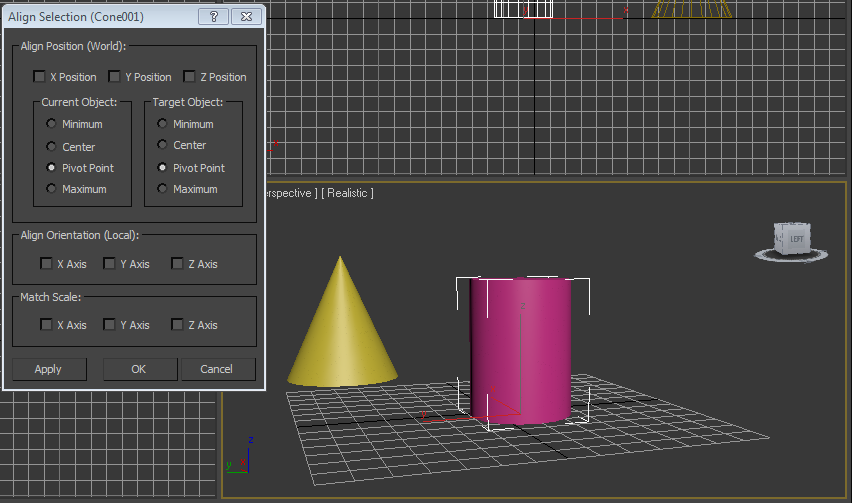
So now with the align window open we have some options for getting the objects where we want them. you are able to alight your objects on any axis you wish and you are also able to line the objects on whichever edge you wish.

First I aligned the objects on the X & Y axis so that they were positioned in the same place with the same centre.

The next stage was to align the maximum (top) of my cylinder with the minimum (bottom) of my cone and then accept.

With hindsight I realised that I went about aligning my objects the wrong way. If I had aligned the cone to my cylinder this would have created slightly less work for myself as once I had aligned the 2 objects I then had to group and move the grouped object up together on the x axis.
Once I had created my towers I grouped them together and cloned them so I had 4 towers I then placed these an equal distance apart in the corners of the grid.
The next step was to create the castle walls this was fairly straight forward as I just drew a box and fine adjusted it to contact 2 towers and then cloned and rotated it 90 degrees each time to create the 4 wall's.

This is how my castle looked after the walls had been built.

The next stage was to make the walls look a bit more like a castle and add some battlements.
The way I did this was with another new tool called boolean. What this allows you to do is create a shape and then position it into another and then cut that shape out.
Firstly you have to select one object and position it to the section you would like removed and then from the compound objects drop down select and Boolean.
From here you are now able to decide which object you would like to remove from the other this is done by selecting subtraction and A from B or B from A you then select which item you would like to be B and the section is removed leaving clean sealed lines on your shape.

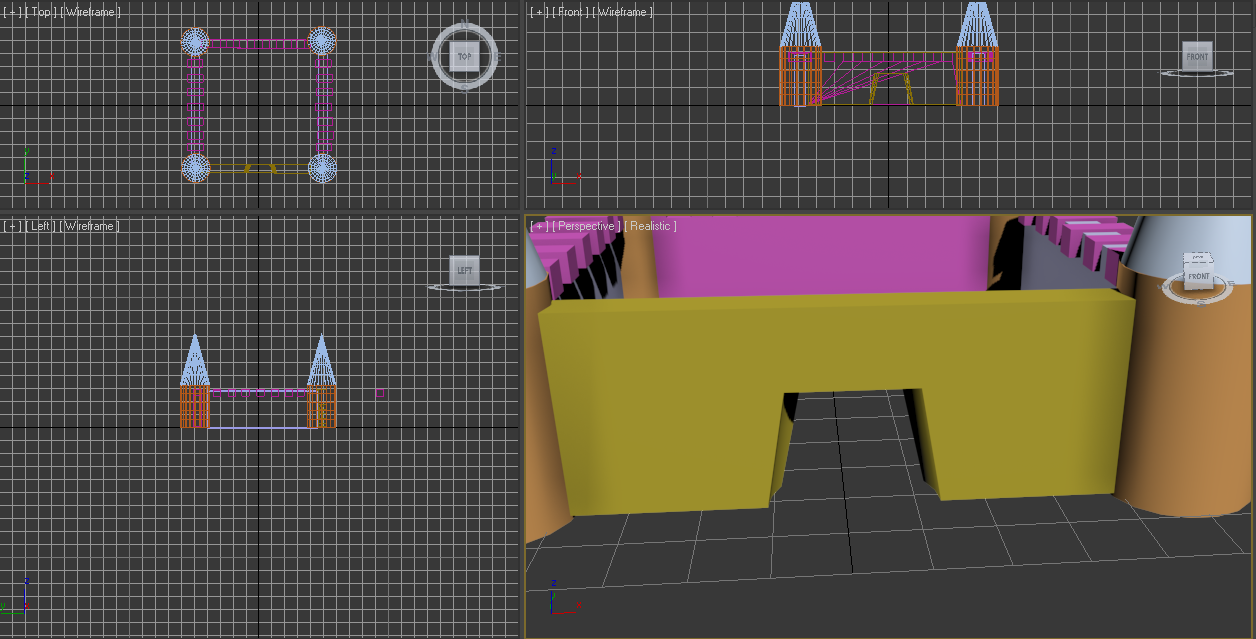
I created a box which I repetitvly cloned and positioned along my walls and then Boolean removed each of the boxes in turn.

To change my cutting tool for my walls I simply rotated it 90 degrees so i could then move down the next wall

The Boolean process in action.


The next thing I did was cut the door out of the front of the castle this was done once again with the boolean tool but I made a nice door shape using a cone and inverting it. this gave the door the nice inward curve I was looking for

I also added some extra sections to my castle once again I used Boolean firstly to cut a smaller box out of another and then to give it more of a battlement feel.

I then cloned the extra battlements so there could be one on each side.

And this is my finished castle.

No comments:
Post a Comment